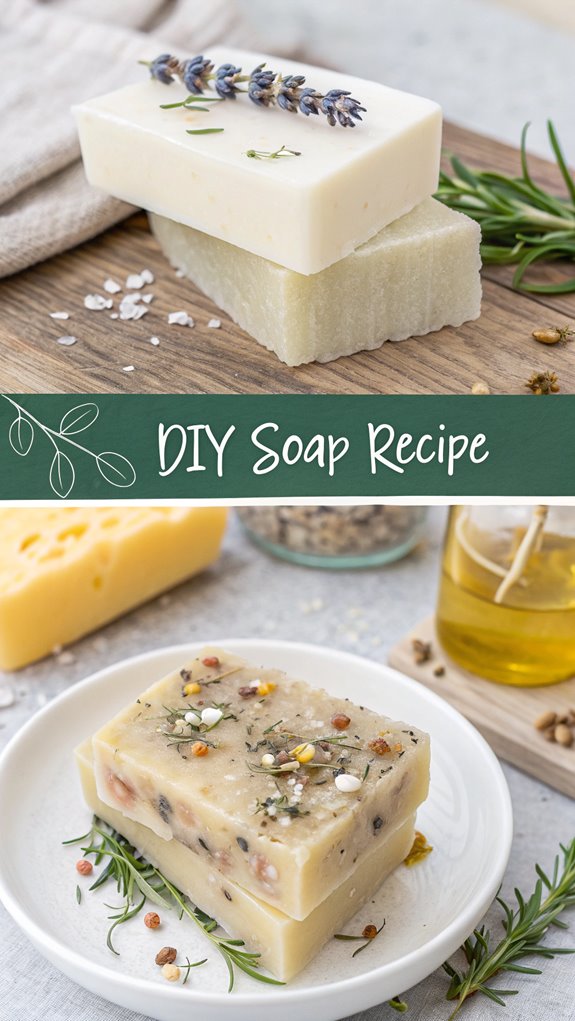
Soap Diy Recipe
Making your own soap is simple and rewarding. You’ll need these ingredients: 16 oz olive oil, 16 oz coconut oil, 12 oz distilled water, 6 oz sodium hydroxide (lye), and optional essential oils for fragrance. Start by measuring lye and water in separate containers, then slowly combine the lye into the water. Heat the oils and monitor temperatures until both mixtures reach about 100°F. Blend them until they reach a “trace” consistency. Pour into molds and cover. Let them cure for 4-6 weeks before use. With careful steps, you’ll create a great product; more tips await you.
Why You’ll Love this Recipe
When you plunge into making your own soap, you’ll quickly discover a world of benefits waiting for you.
First, using natural ingredients means you can avoid harsh chemicals that can irritate your skin. You’ll customize your soap to meet specific needs, like allergies or sensitivities. Plus, essential oils add therapeutic properties, offering relaxation or energy. Additionally, you have complete control over the selection of ingredients, ensuring they align perfectly with your skin’s requirements.
Environmentally, homemade soap produces less waste, and it’s more cost-effective in the long run. You’ll enjoy longer-lasting bars without unnecessary additives.
Creatively, soap making lets you experiment with colors and shapes, making each batch unique. This process also teaches you about different oils and their benefits.
Recipe
Soap DIY Recipe****
Making your own soap at home can be a rewarding and creative endeavor. Not only do you get to customize your soap with your favorite scents and properties, but you also gain control over the ingredients used. This recipe will guide you through the process of cold process soap making, which involves mixing oils with a lye solution to create a beautiful, fragrant bar of soap that’s perfect for personal use or gifts. It’s important to note that different oils have varying saponification values affecting the lye amounts needed, which is crucial for a successful soap.
Before you get started, it’s vital to gather all your materials and make certain you have a safe workspace. Soap making involves working with lye, which can be dangerous if not handled properly. Prepare your area with good ventilation and have your protective gear on hand. Once you’re ready, follow the steps below to create your very own soap.
Ingredients:
– 16 oz Olive oil
– 16 oz Coconut oil
– 12 oz Distilled water
– 6 oz Sodium hydroxide (lye)
– 1-2 oz Essential oils (optional)
Instructions:
1. In a well-ventilated area, put on your protective gear, including safety goggles and gloves. Carefully measure out the sodium hydroxide (lye) and distilled water in separate containers.
- Slowly add the lye to the distilled water (never the other way around) while stirring gently until fully dissolved. Set this lye solution aside to cool.
- Measure and weigh the olive and coconut oils accurately. If using solid coconut oil, melt it gently until it becomes liquid and then combine it with the olive oil in a heat-proof container.
- Use a digital thermometer to monitor the temperatures of both the lye solution and the oils. Wait until both are around 100°F (38°C) and within ten degrees of each other.
- Once the temperatures are appropriate, carefully pour the lye solution into the oils while stirring continuously. Use an immersion blender to blend the mixture until it reaches “trace,” a pudding-like consistency.
- If desired, add your essential oils at this stage and mix well to incorporate.
- Pour the soap batter into molds, smoothing the top if necessary. Cover the molds with a towel to insulate and allow the soap to saponify for 24-48 hours.
- After the soap has hardened, carefully remove it from the molds and cut it into bars. Place the bars on a rack and allow them to cure for 4-6 weeks before using.
Extra Tips:
When making soap, always double-check your measurements and use a reliable soap calculator to determine the correct lye and water ratios. This guarantees the safety and effectiveness of your soap.
Additionally, experimenting with different essential oils and natural colorants can enhance your soap’s appeal. Remember to store your soap in a cool, dry place during the curing process, and never rush the curing time, as this is vital for the soap to become safe for use.
Happy soap making!
Final Thoughts
While creating your own soap can be an enjoyable and fulfilling project, it’s crucial to prioritize safety throughout the process. Here are some key points to remember:
- Handling Lye Safely: Always wear eye protection and lye-resistant gloves. Work in a well-ventilated area, and use heat-resistant equipment. Add lye to water, not the other way around.
- Curing and Saponification: Saponification happens within 24 hours, but curing takes weeks. Though you can use the soap after saponification, waiting enhances its quality. Understanding the differences between saponification and curing can help dispel myths surrounding soap making and improve outcomes.
- General Safety Precautions: Keep children and pets away. Use a clean workspace and have paper towels ready for spills.
Frequently Asked Questions
Can I Customize the Scent of My Soap?
Absolutely, you can customize your soap scent! Blend different fragrance oils or essential oils to create unique combinations. Experiment with various methods to add scents, ensuring you follow safety guidelines for the best results.
How Long Does Homemade Soap Last?
When you craft your soap, think of it as a delicate piece of art. Typically, homemade soap lasts about 6 months to a year. Store it wisely, and watch its beauty endure longer.
Is It Safe to Use Essential Oils in Soap?
Yes, it’s generally safe to use essential oils in soap, but you must adhere to recommended usage rates, check for potential skin reactions, and store them properly to prevent accidents, especially around children and pets.
What Is the Best Way to Store My Soap?
Storing your soap’s like tucking it into a cozy blanket. Keep it in an open-air environment, using bins or shelves, and avoid plastic wrap. Regularly turn the bars for even curing and freshness.
Can I Make Soap Without Lye?
You can make soap without lye by using melt and pour bases, which are pre-made and safe. Alternatively, explore natural saponin plants, but remember, traditional soap-making requires lye for true saponification.
Ingredients
Method
- In a well-ventilated area, put on your protective gear, including safety goggles and gloves. Carefully measure out the sodium hydroxide (lye) and distilled water in separate containers.
- Slowly add the lye to the distilled water (never the other way around) while stirring gently until fully dissolved. Set this lye solution aside to cool.
- Measure and weigh the olive and coconut oils accurately. If using solid coconut oil, melt it gently until it becomes liquid and then combine it with the olive oil in a heat-proof container.
- Use a digital thermometer to monitor the temperatures of both the lye solution and the oils. Wait until both are around 100°F (38°C) and within ten degrees of each other.
- Once the temperatures are appropriate, carefully pour the lye solution into the oils while stirring continuously. Use an immersion blender to blend the mixture until it reaches “trace,” a pudding-like consistency.
- If desired, add your essential oils at this stage and mix well to incorporate.
- Pour the soap batter into molds, smoothing the top if necessary. Cover the molds with a towel to insulate and allow the soap to saponify for 24-48 hours.
- After the soap has hardened, carefully remove it from the molds and cut it into bars. Place the bars on a rack and allow them to cure for 4-6 weeks before using.